Portal Introduction
A Quick “How-To” Guide
Website: Payments.MavComputers.com
Viewing + Paying Invoices
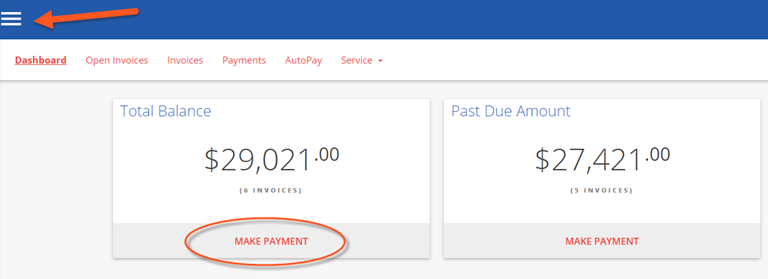
Dashboard
This is the first thing you will see when logging in, known as the “Dashboard” portal section.
- From here you may quickly view invoices and make payments using the prominent tiles.
- The tiles will link to the same “Open Invoices” portal segment.
- Using the three bar menu, you may change your password, logout, or “change companies” if applicable.
Open Invoices
Click the “OPEN INVOICES” menu option:
- All currently open invoices in our system are listed here. Please let us know if items are missing!
- If needed, you may conveniently sort & filter with the three bar button.
- Select the items you wish to pay, and click “Pay Selected”.
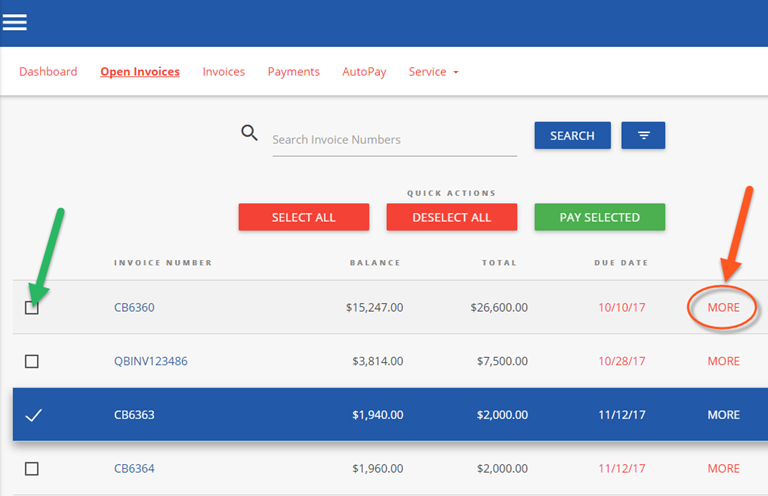
Clicking “MORE” on any invoice will display a details window:
- Please “VIEW” to see the specific line items in PDF format
- The PDF will open in a new browser tab
- (Encountering issues? Try using Google Chrome! Or temporarily allowing pop-ups)
- You may print/save the PDF as desired
- Click on “Comment” to send us an inquiry regarding a particular invoice
- The PDF will open in a new browser tab
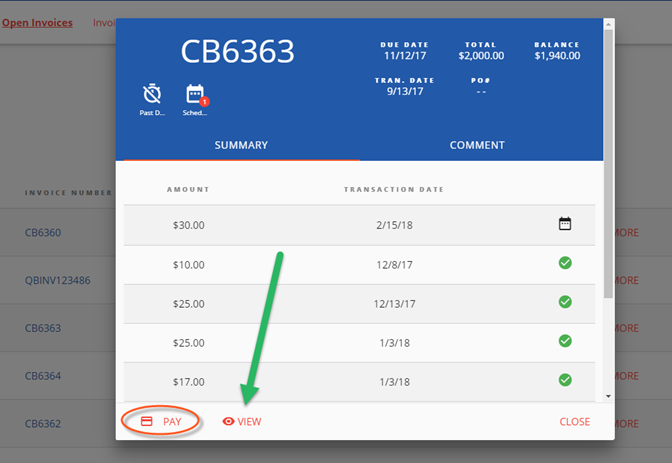
To Process a payment:
- Select the checkbox of one (or multiple) invoice(s). Click “PAY SELECTED”
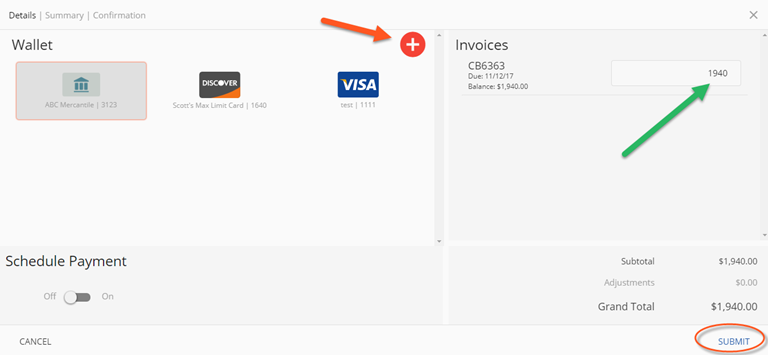
- A dialog will appear: please select a payment method on file, or add a new entry.
- Partial payment amounts can be entered in the top right corner!
- You have the option of splitting payments up with multiple payment methods.
- A dialog will appear: please select a payment method on file, or add a new entry.
Advanced Payment Options:
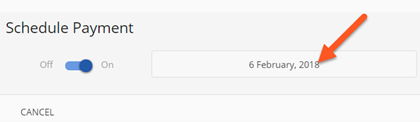
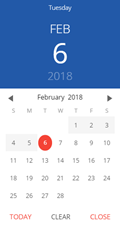
- Selecting the “Schedule Payment” switch to “ON” offers the ability to pick a specific payment date, using the Date Picker.
- This is not an “auto-pay”, but rather a one-time payment for the future.
Clicking “SUBMIT” will give you a chance to review your actions.
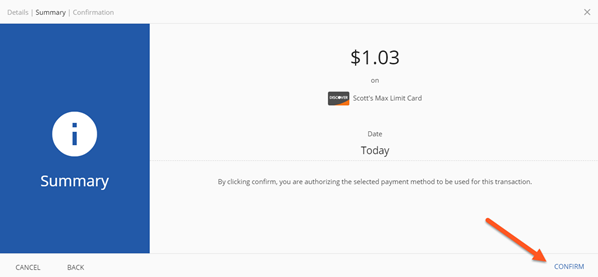
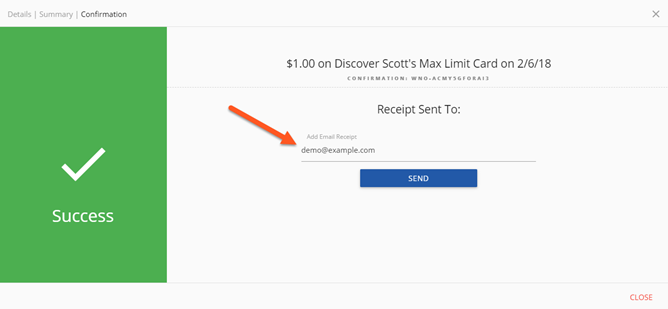
Clicking “CONFIRM” will yield a payment success or failure screen
- An email receipt will be sent to your login email address.
- You may send any additional receipts using the “Add Email Receipt” field.
- If the payment is scheduled for the future, the receipt will show the scheduled payment date.
Invoice History
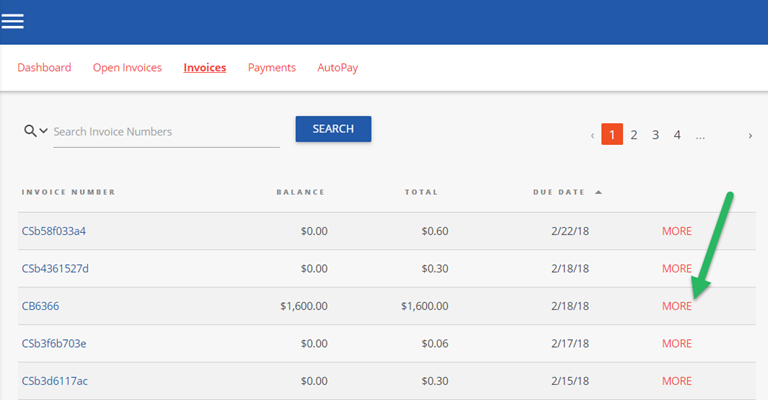
Click on the “Invoices” menu option:
- Click “MORE” on previously issued and archaic invoices
- You may again view specific details, or print & save the PDF
- The page numbers on the right, and search box can help narrow the results
Payments
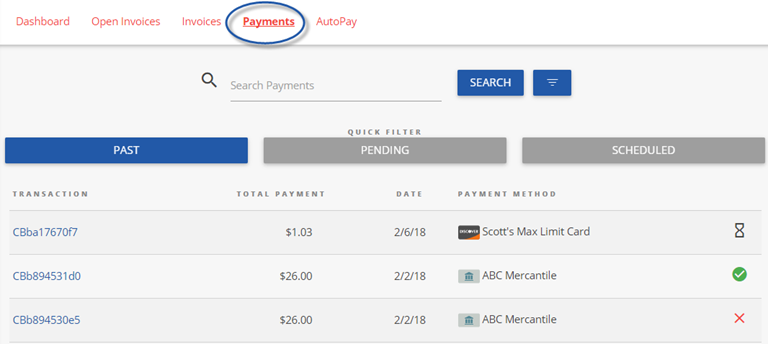
Click on the PAYMENTS menu option:
- View all currently pending, future scheduled (including AutoPay) or past historic payments
AutoPay
Click on the AUTOPAY menu option:
- Click “NEW”, and expand to reveal the available options
- Configure your preferences in 5 steps, as per the example image below
- Note: You can have more than one “AutoPay” Rule/Condition at a time!
- With the below “less than $” example, “one-off” type invoices can also be paid automatically!
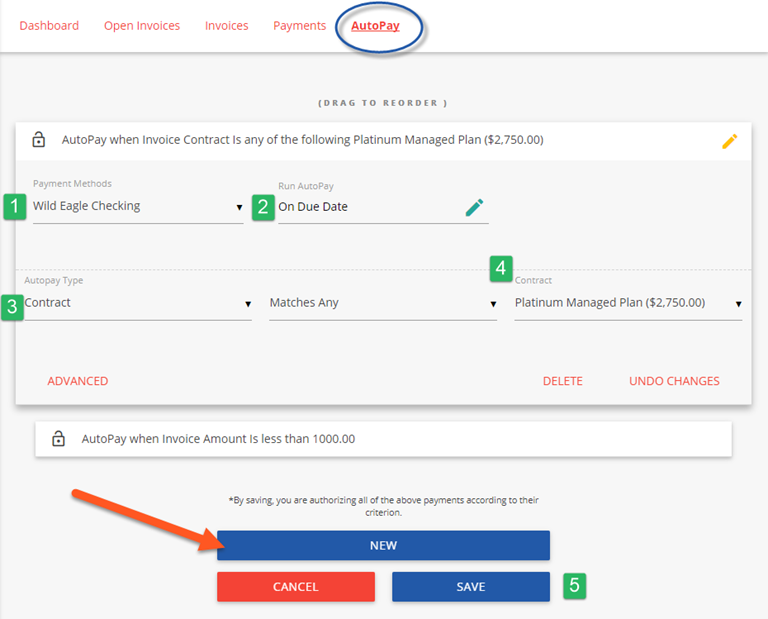
1 – Select the payment method you want this rule to follow
2 – “On Due Date” will pay invoices matching the criteria on the date they are due (not created)
3 – Select “Contract” or “Amount”
4 – Pick the recurring service agreement you would like to be auto-paid
5 – Save your changes!
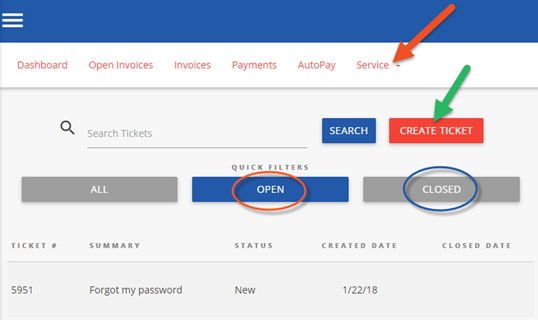
Service
Click on the “Service” menu option:
- Creating a new service ticket is easy as 1 2 3!
- You may also view historic tickets with the “Closed” filter.

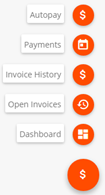
Mobile
Mobile device navigation:
- The top menu bar is replaced by the lower right button, but functions nearly the same.